
 Previous (3)
Project Goals
This project should provide a large amount of reliable storage that performs well at a reasonable cost using components that are both power-efficient and quiet enough for home office use. My previous storage layout consisted of a collection of data disks and two parity disks managed by SnapRAID. This worked well for the most part but there were quite a few disadvantages that made me reconsider this as a long-term solution.
Reasons why I upgraded to ZFS from SnapRAID:- Snapshot RAID comes with a large overhead when there are significant changes made to the array. I would occasionally change a few hundred GiB at a time and this resulted in parity computations that took hours. Deletions needed to be given special care as a rebuild would only have single-disk parity in areas where files have been deleted since the last sync. Real-time RAID is a much better option for a churning data set.
- Disks were accessed individually, and without a unified mount point it could be difficult to keep collections optimally organized. Large files, such as Veracrypt file containers, may not even fit on any of the disks even though the combined free space would be sufficient. There are a few options to obtain a single mount point such as mhddfs, StableBit DrivePool, and MergerFS, but working with the disks by themselves in the future is cumbersome due to logical collections being spread across physical disks in sometimes less-than-optimal ways.
- My existing desktop did not have ECC memory and there is always a small chance of corruption due to a memory error. Many sources will say ECC is not necessary, but it's an additional precaution with few drawbacks (slightly higher price, stricter compatibility requirements, and limited selection).
- NTFS cannot match the features available in ZFS like copy-on-write snapshots and clones, send|receive backup tools, compression, and checksums.
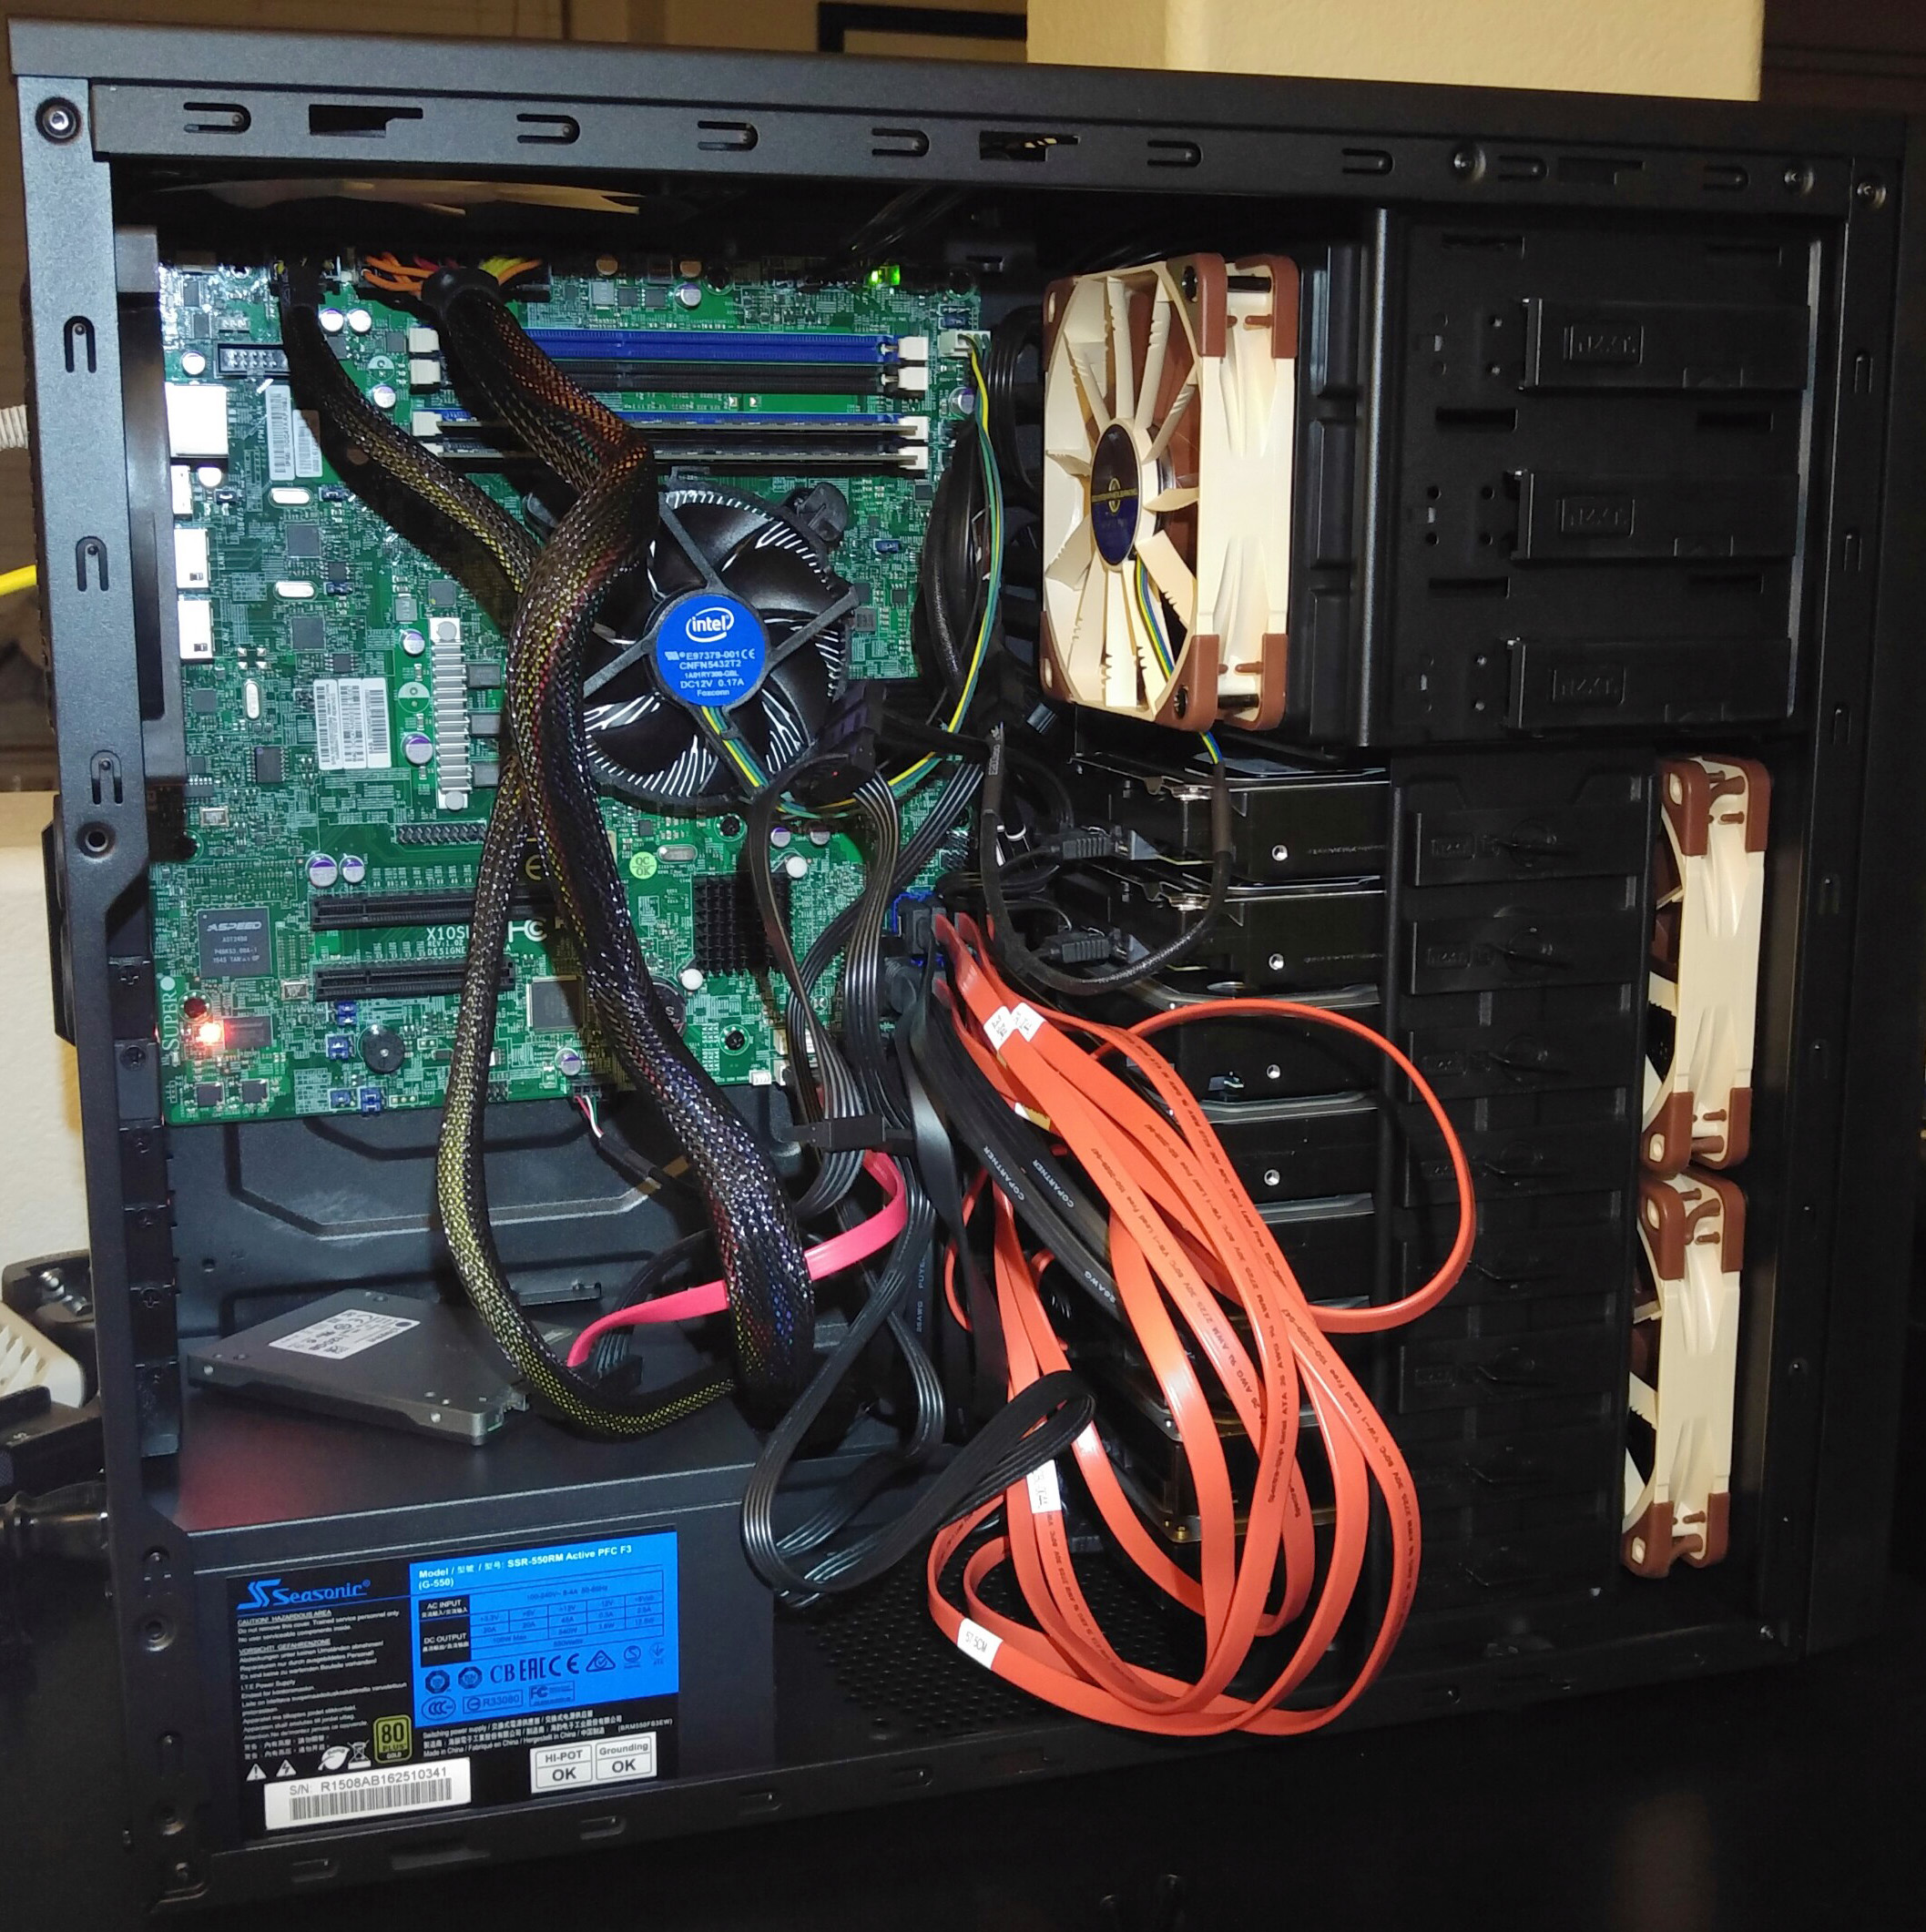
Hardware
- Intel Core i3-4160
- Supermicro X10SL7-F Micro ATX LGA1150 Motherboard
- Crucial ECC 16GB (2 x 8GB) DDR3-1600
- 6x 4TB HGST HMS5C4040ALE640
- 2x 4TB Seagate ST4000DM000
- 120GB Kingston HyperX 3K SSD
- SeaSonic G 550W 80+ Gold Certified Semi-Modular ATX Power Supply
- NZXT Source 220 Mid-ATX Tower (8x internal 3.5")
- Rosewill 4in3 hot-swap drive cage
- 3x Noctua NF-F12 PWM 55.0 CFM 120mm Fan
Operating System
Ubuntu 16.04 supports native ZFS with a simple installation:
sudo apt install zfsutils-linux
Configuring ZFS
After installing ZFS, you'll want to determine the proper arrangement for your disks based on your own particular requirements and expectations. I chose RAIDZ2 because of the storage efficiency only giving up two disks to parity, the performance is able to easily saturate gigabit ethernet, and having just one vdev will not be a problem with only 1-2 concurrent operations as is typical in a home environment. I could have used 4 mirrored vdevs but it's not an optimal storage option given the 50% overhead. Additionally, it's nice to have the security of losing any two disks while maintaining uptime. With mirrors, you only have 1 disk of fault tolerance in the worst case scenario and the resilvering process during a rebuild will heavily tax the remaining disk from the pair. Mirrors will have faster resilvering times, however, and the additional vdevs will provide much better IO operations per second for the pool.
    sudo zpool create tank -o ashift=12 raidz2 sda sdb sdc sdd sde sdf sdg sdh
    sudo zpool export tank
    sudo zpool import -d /dev/disk/by-id tank

    sudo zfs set compression=lz4 tank
    sudo zfs set recordsize=1M tank
    sudo zfs set atime=off tank
    sudo zfs set xattr=sa tank

    sudo zfs create tank/dataset
Ideally, you would specify the disks for the pool using their /dev/disk/by-id/ paths, but in this particular case ZFS was not cooperating and I had to use the short names. It's possible to fix this by exporting the pool and then specifying the directory to use when importing it. This doesn't make a huge difference, but it's nice to see the full name and serial number when checking sudo zpool status. The serial number will help you pull the correct disk in the event of a failure.
    sudo zpool status
    pool: tank
    state: ONLINE
    scan: scrub repaired 0 in 5h13m with 0 errors on Wed Jul 27 03:12:02 2016
    config:

        NAME                                         STATE     READ WRITE CKSUM
        tank                                         ONLINE       0     0     0
          raidz2-0                                   ONLINE       0     0     0
            ata-HGST_HMS5C4040ALE640_PL1331LAHGJURH  ONLINE       0     0     0
            ata-HGST_HMS5C4040ALE640_PL1331LAHG426H  ONLINE       0     0     0
            ata-HGST_HMS5C4040ALE640_PL1331LAHGXPVH  ONLINE       0     0     0
            ata-HGST_HMS5C4040ALE640_PL1331LAHG429H  ONLINE       0     0     0
            ata-HGST_HMS5C4040ALE640_PL1331LAHGHPAH  ONLINE       0     0     0
            ata-HGST_HMS5C4040ALE640_PL1331LAHGL19H  ONLINE       0     0     0
            ata-ST4000DM000-1F2168_Z306592W          ONLINE       0     0     0
            ata-ST4000DM000-1F2168_Z3065TOV          ONLINE       0     0     0

    errors: No known data errors